Greenhouse plastic repairs: quick fixes for common tears
A tear in greenhouse poly film is rarely just a hole. In Lebanon’s coastal humidity, dry inland air, dust, salt exposure, and seasonal wind, a small opening can become a moving failure line.
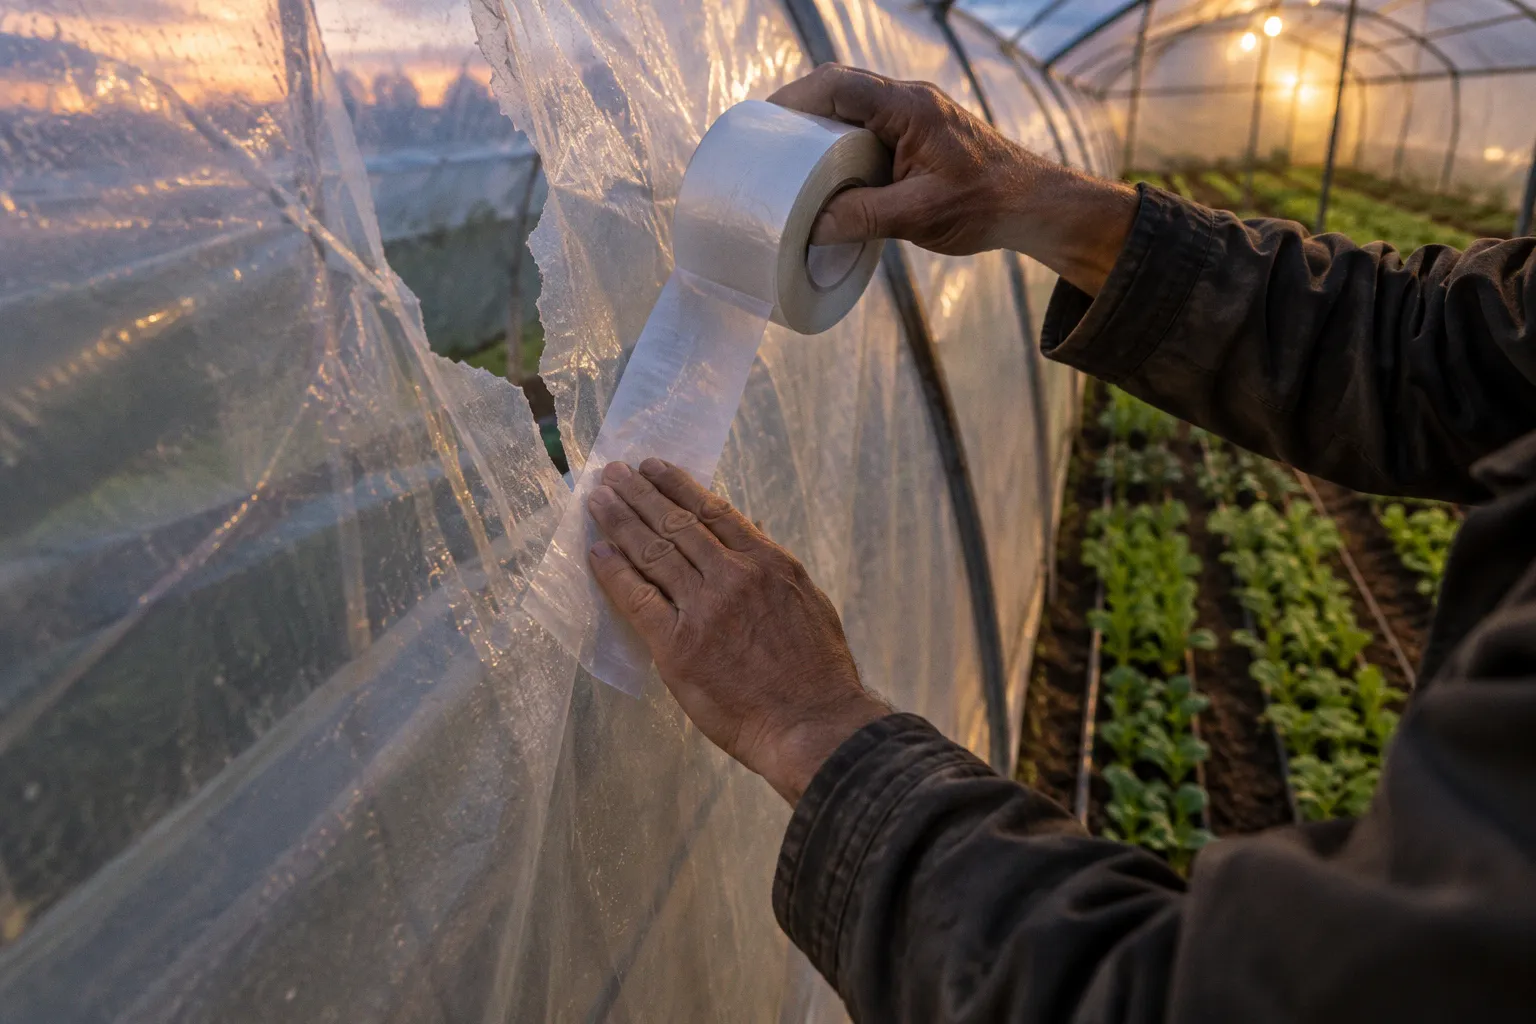
The 0.15-Millimetre Fix That Can Save a Growing Season
The film begins to flap, the edges rub against the frame, and every pressure change places more load on the damaged area.
The first reaction is usually practical: reach for whatever adhesive is already in the maintenance box. Duct tape, packing tape, electrical tape, or a leftover strip from another repair may appear to solve the problem. Sometimes the patch stays in place for a few days. Then the edges begin to curl, the adhesive softens or leaves residue, and the original tear continues to spread underneath.
That is why greenhouse plastic film repair tape application should be treated as a maintenance procedure rather than a quick act of sticking one material to another. The tape, the condition of the film, the preparation of the surface, and the way pressure is applied all determine whether the repair remains useful or becomes another problem to remove later.
A purpose-made greenhouse repair tape is not a substitute for replacing badly degraded film. It is a controlled intervention for local damage: tears, small holes, abrasion marks, and openings around areas where the film has rubbed against a frame or fitting. Used correctly, it can protect the crop while the operator plans a more substantial repair.
Why Standard Adhesives Fail in Lebanese Climates
Greenhouse film is commonly made from polyethylene, including LDPE and co-extruded films that may contain EVA or other additives. Polyethylene has a low surface energy, which makes it difficult for many general-purpose adhesives to wet and grip the surface reliably. A tape may feel strongly bonded when first applied but still have a weak interface underneath.
Outdoor exposure makes the problem more severe. The film is exposed to sunlight, heat, dust, condensation, and repeated expansion and contraction. Coastal structures may also collect salt residue, while inland structures can accumulate fine dust and sand. These conditions do not merely test the adhesive; they also affect the film beneath it.
General-purpose tapes are usually designed for packaging, indoor maintenance, or short-term bonding. Their backings and adhesive systems are not necessarily formulated for prolonged contact with exposed agricultural polyethylene. Several failure patterns are common:
- The tape bonds only to loose contamination. Dust, salt, and oily residue remain between the adhesive and the film.
- The backing becomes brittle or loses strength. Repeated heat and sunlight exposure can make the tape less able to follow the movement of the film.
- The adhesive softens and migrates. A residue remains around the patch, making later cleaning and reapplication more difficult.
- The edge becomes the new failure point. Wind catches a lifted corner and turns a small patch into a peeling flap.
- The damaged film continues to move. If the tape covers the opening without distributing the load, the tear can extend outside the patch.
There is no useful universal timetable for how quickly an ordinary tape will fail. The result depends on the product, exposure, film condition, surface cleanliness, temperature, and the amount of movement in the structure. A tape that survives on a shaded interior surface may fail quickly on a south-facing roof panel.
The wrong tape does not restore the film. It can leave behind a larger, dirtier, and harder-to-repair surface.
For that reason, a temporary strip of household tape should not be confused with a durable agricultural repair. If an emergency patch is unavoidable, it should be treated as a short bridge until the surface can be cleaned and a suitable UV-stabilised tape applied. It should not become the final repair by default.
Selecting the Right UV-Stabilised Repair Tape
Purpose-built greenhouse repair tape is designed around the properties of agricultural film. The backing is generally a UV-stabilised polyethylene film, often supplied in a translucent or white finish. The adhesive is commonly an acrylic system intended to bond to polyethylene and remain functional during outdoor exposure.
The product specifications matter because the tape must do two jobs at once. It must adhere to the film, but it must also move with the film. A patch that is strong but excessively rigid can create a new stress point around its edge.
Thickness
A commonly specified greenhouse repair tape is 5.9 mils thick, or approximately 0.15 mm. That thickness offers a practical balance between flexibility and reinforcement. It is substantial enough to cover a damaged area and resist ordinary flutter, while still being able to conform to a curved or tensioned film surface.
Thickness alone does not determine performance. A tape with the right dimension can still fail if the film is brittle, the surface is wet, or the patch is applied over a sharp fold. The tape should be considered part of a repair system, not an independent structural component.
Width
Common commercial widths include approximately 48, 96, and 144 mm. The right choice depends on the shape of the damage and the need for a clean adhesive margin around it.
The patch should extend beyond the damaged edge on every side. A minimum margin of around 25 mm is a useful application guide where the surrounding film is sound and clean. Irregular tears may require a wider patch because the adhesive must cover branches, stretched sections, and areas where the film has begun to deform.
Do not select the width by measuring only the visible gap. Follow the full tear line. A narrow opening can conceal a longer split under tension, particularly where the film has been rubbing against a hoop, door frame, clip, or ventilation fitting.
Roll length and stock planning
Standard rolls may contain 108 feet, or approximately 33 metres, of tape. That specification helps with stock planning, but it does not support a universal claim about how many structures or growing cycles one roll will cover.
Actual consumption depends on the number and shape of repairs, whether both sides of the film are patched, the width selected, and the amount of tape discarded during cutting or repositioning. A small number of clean holes may require little material. Several branching tears can consume a surprising amount, particularly when the operator uses wider patches and applies them on both sides.
For a farm managing several structures, stock should be recorded after each repair. The useful question is not how many metres a roll is supposed to cover, but how much tape a particular site consumes during its own maintenance cycle.
UV resistance
A 12-month UV-resistance rating is an important specification for outdoor use. It indicates that the tape has been assessed against stated performance parameters over that rated period under the manufacturer’s test conditions. It is not a guarantee that every repair will last for one full growing season, and it does not mean the tape stops working immediately after twelve months.
The practical service life can be affected by exposure direction, shade, heat, wind movement, surface preparation, the age of the film, and the quality of the application. The rating should therefore be read as a planning reference, not as permission to ignore the repair after installation.
| Specification | Typical stated value or option | Why it matters |
|---|---|---|
| Tape thickness | 5.9 mils, approximately 0.15 mm | Provides reinforcement without making the patch excessively rigid |
| Width options | Approximately 48, 96, and 144 mm | Allows the patch to cover different tear shapes with a surrounding margin |
| Roll length | 108 ft, approximately 33 m | Helps the operator plan stock for multiple repairs |
| Adhesive system | Acrylic | Formulated for bonding to low-surface-energy polyethylene |
| UV resistance rating | 12 months of rated exposure | A performance rating, not a universal service-life guarantee |
A specialised repair tape may cost more than a household adhesive tape. That comparison is incomplete if it considers only the price of the roll. Residue removal, repeated labour, crop exposure, and the possibility of replacing a larger section of film are all part of the maintenance cost.
Surface Preparation for Maximum Adhesion
The best greenhouse tape cannot compensate for a contaminated surface. Cleaning is not cosmetic, and it is not a task to perform only when the film looks visibly dirty. A surface can appear clear while still carrying dust, salts, oils, plant residue, condensation marks, or adhesive left by an earlier repair.
The preparation area should be larger than the patch itself. This gives the tape a clean landing zone and reduces the chance that its edge will sit on a contaminated boundary.
1. Stabilise the film
Before cleaning, reduce movement in the damaged area. If the sheet is flapping heavily, work during a calmer period or temporarily hold the film in a way that does not crease or stretch it. Do not pull a tear tight simply to make it look smaller. That tension can cause the split to reopen as soon as the film returns to its normal position.
Inspect the nearby area as well. Look for frame contact, loose clips, sharp wire, protruding screws, and points where the film is rubbing. If the source of abrasion remains, the new patch may fail even when the adhesive bond is sound.
2. Remove loose material while dry
Use a soft cloth or microfibre towel to remove dust, sand, dried plant material, and other loose particles. Avoid abrasive pads, stiff brushes, and tools that can scratch the film. A scratch beside the original tear can become the starting point for the next split.
Where loose dirt has accumulated inside the tear, clean carefully rather than forcing the edges together. The purpose is to expose a stable film surface, not to press contamination into the adhesive zone.
3. Clean the bonding area
A mild detergent solution can be used to remove ordinary dirt and salts. Some operators use isopropyl alcohol, including a 70% solution, where it is compatible with the film and permitted by the tape or film manufacturer. Apply the cleaner with a clean cloth and work beyond the intended footprint of the patch.
Do not flood the film. Excess liquid can run into the tear, collect beneath the patch, or remain trapped at the edge. If the film is coated, treated, or laminated, test the cleaning method on an inconspicuous area first.
Old adhesive requires particular caution. Rubbing aggressively can stretch thin film or generate heat. If residue cannot be removed without damaging the sheet, that is a sign to reassess whether the section should be patched or replaced.
4. Dry completely
The film must be dry before application. Moisture between the tape and polyethylene can interfere with initial tack and leave small voids beneath the patch. In humid coastal conditions, a surface that feels dry at first touch may still hold moisture around folds or the edge of the tear.
Use a clean dry cloth for the final pass and allow the surface to air-dry. Do not apply tape merely because the outside of the film is no longer visibly wet. Check the entire bonding area, including the margins that the tape will cover.
5. Check the surface by touch
The prepared film should feel clean and uniform. It should not feel powdery, greasy, slippery, or tacky from old adhesive. If it does, clean the area again or reconsider the repair location.
The same preparation applies to both sides when using a double-sided patch. Cleaning only the exterior creates an uneven repair: one adhesive interface may be sound while the other is compromised from the start.
Surface preparation is the structural foundation of a tape repair. The patch cannot perform better than the film surface beneath its adhesive.
The Double-Sided Application Technique for Structural Integrity
A patch applied to one side of the film can close an opening and keep out wind, rain, insects, and dust. It may be appropriate for a small, stable hole or for a temporary intervention. But the film still moves under wind pressure and temperature changes. If the damaged area is under tension, the edge of a single patch can become a peel line.
Applying tape to both sides creates a bonded sandwich around the damaged film. It does not turn the sheet into a permanently reinforced panel, and it does not replace a structural repair. It does, however, distribute the load across both surfaces and gives the tear less opportunity to lift the patch from one direction.
Position the exterior patch
Cut a patch that extends beyond the tear on every side. For a straight tear, a rectangle may be efficient. For a tear with rounded ends or branches, an oval or rounded shape is preferable because it avoids sharp corners that concentrate stress.
Remove the release liner carefully. Position the patch without stretching it, then lay it down progressively from one side to the other. This is better than dropping the entire piece at once, which can trap folds or air pockets.
Use a clean squeegee, a flat-edged tool, or the smooth back of a scissor handle to press the tape from the centre toward the edges. Work steadily rather than dragging the patch. The aim is full contact between adhesive and film.
Repeat on the interior
Prepare and clean the opposite side before applying the second patch. Use a similar shape and size where access allows, aligning it with the exterior patch. Perfect visual alignment is less important than ensuring that both patches fully cover the damaged zone and share a broad area of sound film.
For roof panels and high areas, safety comes first. Do not climb on greenhouse film or improvise a position that places body weight on the sheet. A repair that cannot be reached safely should be postponed or carried out with appropriate access equipment.
Compress the finished repair
Make a final pressure pass over both patches. Pay attention to the perimeter, where lifting usually begins. Press from the centre toward the edge and check for wrinkles, channels, or unbonded sections.
If a corner has lifted during application, do not simply press it back over dirt. Lift or trim the compromised portion only if that can be done without extending the tear, clean the area again, and apply a fresh patch with adequate overlap.
The double-sided method consumes more tape and takes longer than a single-sided patch. It is most useful where the damaged film is still flexible and structurally sound, and where wind movement makes edge peel a concern. It is not a reliable answer for film that has become brittle, chalky, or heavily cracked.
The maximum tear length that can be considered structurally safe for tape repair is not established by the tape dimensions alone. Length, width, direction, branching, tension, wind exposure, film age, and the condition of the surrounding sheet all matter. Larger or irregular damage should therefore be treated as a site-specific judgement, not as an automatic tape job.
When to Patch and When to Replace Your Greenhouse Film
The decision is not governed by a single measurement. A small tear in degraded film may be a poor candidate for patching, while a somewhat larger clean tear in flexible film may remain repairable as a short-term measure. The operator needs to assess the condition around the damage, not just the gap itself.
Patch when the surrounding film is sound
A tape repair is most defensible when:
- the film remains flexible rather than brittle;
- the tear has a clear edge and does not branch repeatedly;
- the surrounding area is free from extensive chalking, cracking, or yellowing;
- the film is not continuously rubbing against a sharp frame component;
- there is enough sound material around the opening for the patch to bond;
- the repair can be inspected after installation.
The patch should not be used to hide a recurring mechanical problem. If a door, clip, trellis, wire, or ventilation fitting is damaging the film, correct that contact point before or during the repair.
Replace when the film itself has failed
Replacement becomes more appropriate when the film shows widespread degradation. Warning signs include loss of flexibility, a brittle feel, surface chalking, extensive discolouration, repeated cracking, and tears appearing in several unrelated locations.
In this situation, the tape may adhere strongly to the surface while the surface itself breaks away from the rest of the sheet. The weakness is no longer at the adhesive interface; it is in the film substrate. A high-performance patch cannot restore the original tensile strength of material that has already become fragile.
Replacement is also more practical when damage is concentrated around a door, ridge, ventilation opening, or windward side. Repeated patching in one area can add stiffness and create an uneven pattern of movement. That does not produce a dependable engineering threshold, but it is a clear maintenance signal: the section deserves closer inspection and may be costing more in labour than a planned replacement.
Treat patch counts as warning signs, not engineering limits
There is no universal number of patches that automatically makes a sheet unsafe. The effect depends on their size, spacing, location, the condition of the film, and the stresses in that part of the greenhouse.
Several small patches spread across a healthy sheet may have little practical effect. Multiple overlapping patches around one frame contact point tell a different story. They indicate repeated abrasion or a localised failure that has not been corrected.
A useful inspection record can include:
| Observation | Likely response |
|---|---|
| Small, clean tear in flexible film | Prepare the surface and apply a suitable patch |
| Hole near a source of rubbing | Remove or protect the source before patching |
| Branching tear with sound surrounding film | Consider a wider, rounded double-sided patch and monitor it |
| Brittle, chalky, or heavily cracked film | Plan section or full-sheet replacement |
| Several repairs in one stressed area | Investigate the cause; do not simply add another layer |
| Patch edge lifting after application | Stop, clean the area, and reassess the film and adhesive contact |
Exact tear-length cutoffs should be treated cautiously. A number printed in a maintenance note cannot account for wind exposure, film tension, tear direction, or the quality of the substrate. If a repair is large enough to flap, distort the sheet, interfere with ventilation, or sit in a heavily loaded area, replacement or mechanical reinforcement is usually the more responsible option.
Making Repairs Part of Greenhouse Maintenance
The best repair is the one made before the film has been enlarged by wind. Walk the structures at a regular interval and inspect the places where damage begins: door openings, sidewalls, corners, attachment points, ventilation hardware, and areas close to crop-support equipment.
Look for small cuts, cloudy abrasion marks, loose edges, and sections that move differently from the surrounding film. A change in movement can reveal damage before a hole is obvious from the ground.
Keep the repair kit specific to the work:
- UV-stabilised greenhouse repair tape in more than one width;
- clean microfibre cloths;
- a mild cleaning solution or compatible isopropyl alcohol;
- a smooth pressure tool;
- scissors with clean blades;
- gloves and safe access equipment;
- a record of where each patch was applied and when.
Store the tape away from excessive heat, dust, and direct sunlight. Keep the release liner intact until the moment of application. A roll that has collected dirt on its adhesive side is no longer a controlled repair material.
After patching, inspect the repair again during the next routine walk-through and after a period of strong wind. Check the corners, the perimeter, and the film immediately around the patch. Early lifting is easier to correct than a patch that has peeled far enough to pull the original tear open.
The goal is not to make every damaged sheet last indefinitely. It is to separate local, manageable film damage from a wider failure of the covering. A 0.15 mm UV-stabilised repair tape can be an effective tool when the film is still sound, the surface is properly prepared, and the patch is applied without shortcuts. It becomes the wrong tool when it is used to postpone replacement of brittle film or to conceal an unresolved source of mechanical damage.
In Lebanese greenhouse conditions, that distinction matters. Reliable production depends less on finding a miraculous adhesive than on making small repairs early, using materials designed for exposed polyethylene, and recognising when the sheet has reached the end of its useful service.