Vermicompost production: a 6-stage cycle for Lebanese soil
In Lebanese farms, soil degradation rarely arrives as a single dramatic failure. It appears as a gradual loss of crumb structure, shorter moisture retention after irrigation, harder tractor pans, and crops that need more inputs to produce the same harvest.
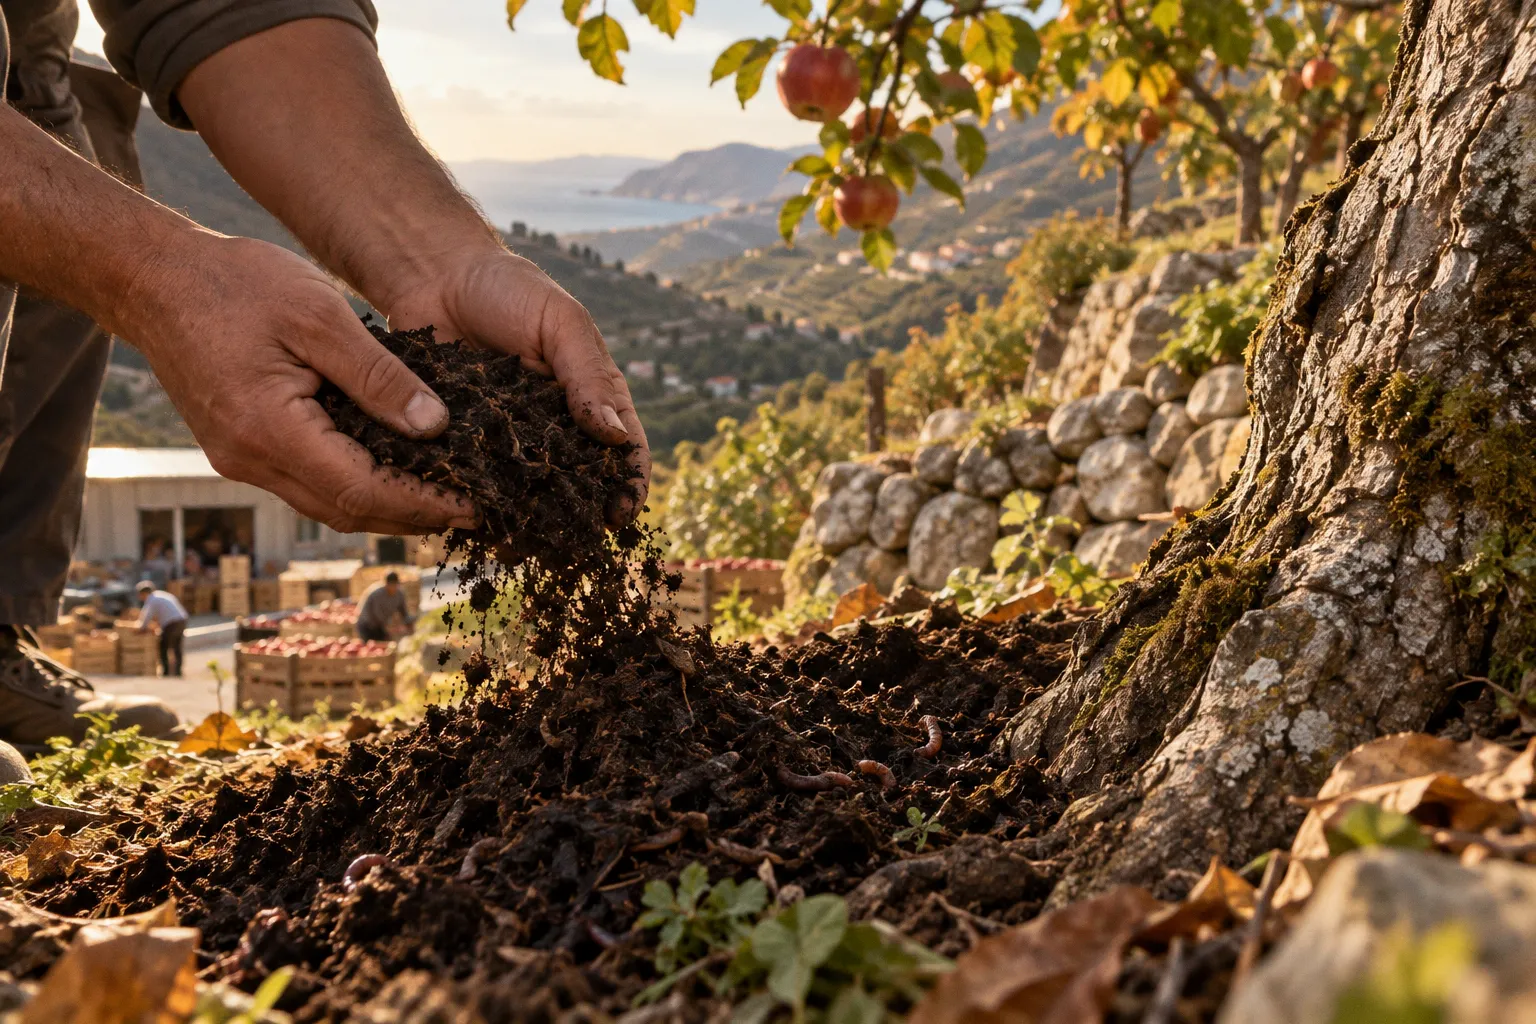
In the Bekaa, where hot summers and irregular rainfall already pressure soil moisture, this decline becomes especially visible in vegetables, orchards, and other high-value crops.
Vermicompost production offers a practical way to return organic matter to the soil while dealing with a material farms already have: manure, crop residues, and other biodegradable waste. But the system is not simply a pile of worms eating fresh waste. Successful vermicomposting depends on temperature control, carbon-to-nitrogen balance, moisture, bed design, and a harvest process that protects the biological quality of the finished amendment.
The following six-stage cycle is designed for Lebanese farm conditions, particularly small and cooperative-scale operations using Eisenia fetida, the red wiggler or compost worm.
Vermicomposting works because it manages decomposition carefully. The worms are not a shortcut around biology; they are part of the biology.
1. Feedstock management: prepare the waste before it reaches the worms
The first vermicompost production step for Lebanese farms begins before the worms are introduced. Feedstock quality determines whether a bed remains cool and aerobic or turns into a hot, anaerobic mass that kills the worm population.
A farm may have plenty of organic material and still lack suitable worm feed. Fresh livestock manure is rich in nitrogen and can release substantial heat during the first phase of decomposition. If it is placed directly into a vermi-bed, the temperature may rise beyond the worms’ working range. The same caution applies to wet, compacted residues and materials that are chemically unstable.
Agricultural residues can include:
- Partially decomposed cattle, sheep, or poultry manure
- Chopped vegetable leaves and stems
- Dry stalks, straw, husks, and other carbon-rich crop residues
- Weeds that have not gone to seed
- Farm-based plant material free from persistent pesticide contamination
- Pre-composted organic residues from cooperative packing or processing areas
Fresh manure should undergo pre-fermentation or partial thermophilic composting first. This stage reduces the initial heat and moderates the strong nitrogen activity. The material does not need to become finished compost before it enters the worm bed, but it must no longer be hot, sharply ammoniacal, or steaming internally.
Olive-mill residues require particular care. Direct olive-mill pomace should not be fed immediately to Eisenia fetida. It is dense, often acidic, and can contain compounds that make it unsuitable as a fresh worm feedstock. If a cooperative wants to use it, the residue should be blended and pre-treated through an appropriate composting process before a small, controlled portion is introduced.
Build a balanced feedstock blend
A useful starting point is a mixture of approximately 60% partially decomposed manure and 40% dry agricultural waste. The dry fraction creates air spaces and supplies carbon, while the manure provides nitrogen and moisture.
Raw feedstock is generally most manageable when its carbon-to-nitrogen ratio falls within the 20:1 to 40:1 range. Exact measurement is not always available on a farm, so physical signs become useful:
- A mixture that smells strongly of ammonia is too nitrogen-heavy or insufficiently stabilized.
- A mass that becomes slimy and airless contains too much wet material and too few structural carbon materials.
- A dry, straw-dominated blend may remain stable but decompose slowly because the worms cannot access enough moisture and nitrogen.
- A darkening, warm-but-not-hot mixture with an earthy smell is closer to the condition worms can tolerate.
Lebanon’s waste stream makes this preparation relevant beyond individual farms. The country generates roughly 3,500 tons of municipal solid waste daily, with an estimated 50% to 70% consisting of organic material. Not all of that material is appropriate for agricultural vermicomposting, particularly when it is mixed with plastics, metals, chemicals, or unknown contaminants. But the scale shows why source separation matters. Clean organic residues can become an input rather than a disposal problem.
For a farm or cooperative, the practical boundary is simple: use materials whose origin is known, remove contamination at the source, and do not ask the worms to solve a sorting problem.
2. Engineer the vermi-bed for Lebanese heat
A vermicomposting system setup does not need sophisticated equipment, but it does need a design that respects the temperature and airflow requirements of surface-feeding worms.
For farm-level production, a standard bed can be approximately:
| Parameter | Practical specification |
|---|---|
| Length | 10 feet |
| Width | 3 feet |
| Depth | 1.5 to 2 feet |
| Maximum depth | 2 feet, or about 60 cm |
| Moisture in the working material | 60%–80% |
| Main worm species | Eisenia fetida |
| Suitable operating temperature | 18°C–30°C |
The depth limit is not a minor construction preference. Eisenia fetida works near the surface, where fresh organic material, oxygen, and moderate moisture meet. A bed deeper than 2 feet can trap heat in the lower layers, especially when the material is wet or compacted. That creates anaerobic pockets and may suffocate or kill the worm population.
In the Bekaa Valley and other warm agricultural areas, shade is part of the structure. A roof or shade cloth can reduce direct solar heating, but the bed still needs ventilation. A sealed enclosure may protect against sun while trapping hot, humid air. The objective is not to keep the bed cold; it is to prevent sharp temperature swings and stagnant conditions.
A sound bed should provide:
- A level base that drains excess water without washing out the material
- Shade during the strongest sun
- Protection from heavy rain, which can flood and cool the bed suddenly
- Enough access for turning or checking feedstock without disturbing the worms
- A surface cover such as moist burlap, straw, or another breathable material
- A design that allows excess liquid to escape rather than accumulate beneath the bed
The bedding layer should be loose, moist, and aerated. Chopped straw, partially decomposed plant residues, and mature compost can help create the first habitat. Avoid packing the material down to increase capacity. Worms need contact with organic matter, but they also need oxygen moving through the pore spaces.
Moisture is best assessed by feel when no meter is available. The material should be evenly damp, not dripping. If a handful releases a stream of water when squeezed, drainage and aeration are inadequate. If it falls apart as dry fibers and feels warm inside, the bed needs moisture and perhaps more shading.
In a Mediterranean climate, shade and drainage are not accessories to the worm bed. They are part of the microbial management system.
3. Inoculate with the right worms at the right density
The species matters. Eisenia fetida is an epigeic earthworm: it lives in rich organic material near the surface and is adapted to decomposing residues. It is not interchangeable with native deep-burrowing earthworms that improve mineral soil structure but are not designed for intensive vermicompost production.
A standard 10-by-3-by-2-foot bed can hold approximately 1,500 kilograms of prepared organic substrate and be inoculated with 2 to 3 kilograms of live worms, equivalent to roughly 2,000 to 3,000 worms. These figures are a starting density for a full bed, not a reason to compress more material into a smaller structure.
Before stocking, check three conditions:
1. The feedstock has cooled. Warm decomposition should have passed its hottest phase.
2. The moisture is within range. The target is approximately 60%–80%, with no standing water.
3. The bed is biologically settled. A small handful of worms can be introduced first as a test population if the feedstock is unfamiliar.
Place the worms gently across the surface and allow them to move down into the bedding. Do not bury them deeply or mix the bed aggressively immediately after stocking. Their first response is useful information: healthy worms should move away from bright light and enter the moist organic layer.
The population will adjust to the available food and habitat. Overfeeding does not accelerate the process. It creates an accumulation of fresh material that can heat, ferment, compact, and produce odors before the worms can process it. Add feed in thin layers or in defined sections, allowing the existing material to soften and reduce before adding more.
If a cooperative operates several beds, staggered inoculation can reduce risk. Rather than stocking every bed on the same day, establish one stable bed first, monitor its behavior, and use the knowledge gained to prepare the next unit. This is slower than filling an entire site immediately, but it protects the biological stock and gives workers a working standard for temperature, moisture, and smell.
4. Manage the active decomposition phase
The active vermidecomposition phase is where daily observation matters most. A worm bed does not require constant intervention, but it does require a clear response to changing conditions.
Eisenia fetida operates most effectively between 18°C and 30°C. Adult worms can survive a broader ambient range, approximately 0°C to 35°C, but survival is not the same as productive processing. In Lebanese summer conditions, a bed may remain technically alive while the worms feed less actively, retreat from hot zones, or become vulnerable to sudden drying.
Monitor the bed through four simple indicators:
- Temperature: Check several points, not only the surface. A hot center indicates incomplete stabilization or excessive depth.
- Moisture: Look below the cover and near the edges. A wet surface can conceal a dry interior, while a damp edge can conceal waterlogging underneath.
- Odor: An earthy smell suggests active aerobic decomposition. Ammonia, sour fermentation, or rotten odors indicate imbalance.
- Texture: Healthy material gradually becomes darker, more granular, and less recognizable as its original residue.
When the bed becomes too wet, improve drainage and add dry, shredded carbon material. When it becomes too dry, apply water gently rather than flooding the bed. A fine spray or slow irrigation is preferable to a sudden heavy pour because it distributes moisture without collapsing air spaces.
Turning is not handled in the same way as ordinary thermophilic composting. Frequent, forceful turning can injure worms and destroy their feeding zones. Instead, loosen compacted areas carefully, add coarse bedding where necessary, and place new feed in a layer or pocket. If a bed has developed a hot anaerobic core, the underlying problem is usually feedstock preparation, excessive depth, poor drainage, or overfeeding.
Pesticide residues also deserve attention. Vermicomposting is not a reliable method for neutralizing every agricultural chemical. Feedstock from treated crops should be assessed according to the product used, its persistence, and the intended end use of the vermicast. For farms pursuing organic certification or export-sensitive production, maintaining clean input records is as important as the composting itself.
The biological benefit of vermicast comes from more than its nutrient label. Vermicompost typically contains approximately 1.2%–3.2% total nitrogen, 0.2%–0.8% phosphorus, and 0.5%–2.5% potassium, along with humic substances, plant-growth compounds such as auxins and gibberellins, and beneficial soil microorganisms. These values can vary with feedstock and process conditions. The amendment should therefore be treated as a biologically active soil input, not as a perfectly standardized substitute for every fertilizer.
5. Harvest and separate the vermicast without losing its value
Harvesting is a separation problem as much as a timing problem. Finished vermicast should be dark, granular, moist but not saturated, and largely free of recognizable feedstock. Some fibrous pieces may remain, particularly when the bed contains coarse straw, but the material should no longer resemble fresh manure or recently chopped residues.
A simple harvesting method is to move finished material gradually to one side of the bed and place fresh feed on the empty side. Over several days, many worms will migrate toward the new food. The older material can then be removed from the opposite side, while the remaining worms and unprocessed material stay in the active zone.
Another approach is to form small piles of vermicast under bright, indirect conditions. Worms move away from light and toward the lower layers, allowing the upper material to be removed gradually. This requires patience and should not be carried out under harsh midday heat.
Screening can improve consistency for nursery mixes, cooperative packing operations, or high-value crops. A screen removes larger undecomposed pieces and returns them to the active bed. It also separates worm-rich material that can be used to inoculate a new unit.
The target is not a sterile product. Beneficial microbial activity is part of the value of vermicast. Excessive drying, prolonged exposure to direct sun, or storage in sealed plastic bags can reduce that biological activity and create unwanted heating or anaerobic conditions.
Store finished material under cover, in breathable containers or shallow piles that do not compact. Keep it protected from heavy rain and direct sunlight. If the vermicast still feels hot, smells sour, or contains large amounts of fresh feedstock, it needs more curing time before field use.
Vermicast and vermiwash are not the same product
Vermicast is the solid worm-processed material. Vermiwash is a liquid collected or prepared from the system and is often diluted before foliar application. The provided production guidance gives a dilution ratio of 1:10 with water, but liquid products should not be treated as automatically safe for every crop or application method.
Use clean water, avoid applying a strong solution during heat stress, and test on a small section before treating an entire crop. For export-oriented farms, records should include the date, dilution, source material, crop, and application method. This creates traceability without turning a simple biological input into an unmanageable paperwork exercise.
6. Cure, grade, and apply it according to the crop
Curing gives the material time to stabilize after separation. It is the stage where a farm decides whether its vermicast is suitable for field incorporation, orchard use, nursery mixes, or another purpose.
A good curing area is shaded, ventilated, and protected from flooding. Keep the material slightly moist, but do not maintain it as a saturated mass. The aim is to preserve biological activity while allowing residual decomposition to settle.
Grading can be practical rather than industrial. Separate material into categories such as:
- Fine, mature vermicast for seedling and nursery use
- General-grade material for vegetable beds and field incorporation
- Coarser material returned to the active bed for further processing
- Material held for additional curing because it remains warm or has an unstable odor
Application rates should reflect crop demand, soil condition, irrigation practice, and the existing nutrient program. General guidance gives approximately 400 to 600 kilograms per bigha for field crops and up to 1,000 kilograms per bigha for high-value horticultural and orchard crops. A bigha is not a universally fixed unit across all agricultural contexts, so Lebanese farms should convert the recommendation to their own land measure before spreading material. More is not automatically better: excessive organic inputs can create nutrient imbalance, salinity concerns, or unnecessary cost.
For Lebanese soil health, placement and timing often matter more than a single large application. Incorporate vermicast into the root zone or apply it around established trees where irrigation can carry moisture through the amended layer. Avoid leaving it exposed on the soil surface through hot, dry weather, where organic matter loses moisture and biological activity declines.
The best use also depends on the crop cycle:
- Before planting: incorporate mature vermicast into prepared beds so moisture and microbial activity are available as roots establish.
- During early growth: apply a moderate side dressing where the root system can access it without burying the stem.
- For orchards: place material within the irrigated root zone rather than directly against the trunk.
- After harvest: return clean crop residues to the composting system and rebuild the feedstock supply for the next cycle.
This approach connects soil amendment production to the whole farm rather than treating vermicomposting as a separate project. Crop residues become feedstock. Manure becomes a managed input. The finished material returns nutrients and organic matter to the same production system.
A seasonal operating calendar for Lebanese farms
A vermicomposting unit should be adapted to the local season, not operated as if temperature and water availability were constant.
Late winter to early spring: establish and stabilize
This is a useful period for constructing beds, preparing shade, separating feedstock, and beginning the first stabilized manure blend. Start with one bed if workers are unfamiliar with the process. Check temperature and moisture frequently while the first population establishes.
Before the main planting period, the farm should have enough mature material for early applications. Do not rush unfinished feedstock into the field simply because the planting date is approaching.
Spring: build feedstock while crops are actively growing
Vegetable residues, pruning material, and manure can be sorted continuously. Chop large stems and mix wet residues with dry carbon materials. Keep fresh inputs in a pre-treatment area so they can cool before entering the worm beds.
Spring is also a good time to compare beds. One bed may be processing more quickly because it has better shade or a more balanced carbon-to-nitrogen ratio. Treat these observations as farm data. The goal is to identify repeatable conditions, not to rely on guesswork.
Summer: protect the biology from heat and drying
In hot weather, shade, moisture control, and bed depth become critical. Inspect the center of the bed, not only the surface. Water in small applications, preferably during cooler parts of the day, and protect the bed from direct afternoon sun.
Reduce feeding if the material is accumulating faster than the worms can process it. A pause in fresh input is safer than forcing a hot bed to accept more waste.
Autumn: harvest, apply, and rebuild
After major harvest periods, farms often have a strong supply of residues. Separate diseased or chemically uncertain material from clean feedstock. Harvest mature vermicast for orchard and field applications, then return the coarse fraction to the active beds.
Autumn applications can support soil preparation before winter crops and replenish organic matter after intensive summer production. If heavy rain is expected, protect both curing piles and active beds from flooding.
Winter: maintain rather than overwork
In cooler conditions, worm activity slows. Keep the beds protected from excessive rain and avoid adding large volumes of cold, saturated material. Review records from the previous season: which feedstocks heated, where moisture was lost, and which crops responded well to the amendment?
A cooperative can use this quieter period to standardize its process, train new workers, and decide whether additional beds are justified.
From soil amendment to export readiness
For Lebanese cooperatives connected to international fresh-produce markets, vermicomposting has value beyond replacing part of a fertilizer bill. It can support a clearer input history, better soil management, and a more credible pathway toward buyer requirements related to residue control, soil stewardship, and production records.
It does not, by itself, create organic certification or satisfy every export standard. Certification depends on the full production system: permitted inputs, field history, pest management, worker records, storage, traceability, and the rules of the destination market. Vermicompost becomes useful within that system when the cooperative can document what entered the beds, how it was processed, where it was applied, and which crops received it.
That documentation can remain simple:
- Record the source and approximate quantity of each feedstock.
- Note pre-treatment dates and whether the material was hot, moist, or stable before stocking.
- Track bed temperature and moisture observations.
- Record worm additions, harvest dates, and storage conditions.
- Link each application to a field, crop, and season.
- Keep separate records for vermicast and liquid extracts.
This is the point where soil biology and market access meet. A healthier soil profile can support water retention and root development, while a disciplined input record helps a cooperative answer questions from buyers and auditors.
The practical lesson is not to build the largest vermicomposting facility possible. It is to build a system the farm can feed with clean material, shade in summer, monitor consistently, and empty at the right stage. Start with one correctly designed bed. Stabilize the feedstock. Maintain the worms within their biological range. Harvest only mature material. Then scale according to the crop area and the cooperative’s actual supply of residues.
Vermicompost production steps for Lebanese farms are ultimately a cycle of observation and return: waste is stabilized, biology transforms it, soil receives it, and the next season supplies the raw material again. The system becomes resilient when each stage is managed as carefully as the crop itself.